In the world of nail art, there’s a common misconception that short nails can’t be stylish, but with the right techniques and inspiration, anyone can achieve a luxurious look. Here’s the truth: short nails can be just as fashionable as long ones, and with the right nail art techniques, you can create a look that’s both high-end and uniquely yours.
You might be wondering: what makes 7 Fuse Style Nail Art so special? The answer lies in its versatility and trendiness, making it perfect for short nails. This style can be adapted to suit any personal style, from classic and elegant to modern and edgy. Whether you’re a fan of Chanel‘s timeless designs or Gucci‘s bold statements, fuse style nail art can be tailored to fit your aesthetic.
What most people miss: the importance of outfit formulas in creating a cohesive look. When it comes to pairing your nail art with your wardrobe, it’s all about balance and harmony. For example, if you’re wearing a little black dress from Zara, you can add a pop of color with your nail art to create a stunning contrast. Consider pairing a bold, red lip color from MAC with a subtle, neutral nail shade from Essie.
Body-inclusive advice is also crucial when it comes to nail art. Every body type and skin tone is unique, and it’s essential to find a style that flatters yours. If you have cool skin, look for blue-based nail colors that will complement your tone. If you have warm skin, opt for yellow-based shades that will enhance your natural glow.
When it comes to creating a luxury look on a budget, it’s all about mixing high-end and affordable pieces. You can invest in a high-quality nail polish from Tom Ford and pair it with a more affordable nail art tool from Sally Hansen. This will not only save you money but also create a unique, one-of-a-kind look.
Pro Tip: to create a high-end look without breaking the bank, consider investing in a good quality top coat from Deborah Lippmann and pairing it with a more affordable base coat from NYX. This will help extend the life of your nail polish and give you a salon-quality finish.
You might be wondering: how do I incorporate 7 Fuse Style Nail Art into my daily look? The answer is simple: start by experimenting with different nail art techniques and outfit formulas. Try pairing a bold nail color with a neutral outfit, or vice versa. Don’t be afraid to mix and match different styles and trends to create a look that’s uniquely yours.
Here’s the truth: creating a luxury look with short nails is all about confidence and experimentation. With the right nail art techniques, outfit formulas, and body-inclusive advice, you can create a look that’s both high-end and uniquely yours. Whether you’re a fan of budget-friendly options like Wet n Wild or investment pieces like Christian Louboutin, the key is to have fun and experiment with different styles until you find what works best for you.
As you explore the world of 7 Fuse Style Nail Art, remember that it’s all about self-expression and creativity. Don’t be afraid to try new things and step out of your comfort zone. With a little practice and patience, you can create a luxury look that’s both stunning and uniquely yours. With the right inspiration and techniques, you can take your nail art game to the next level and create a look that’s truly show-stopping.
The 7 Fuse Style Nail Art Ideas
What to cover: These 7 fuse style nail art ideas are designed to make short nails look luxurious, with a focus on creativity, versatility, and attention to detail. From simple and understated to bold and eye-catching, each idea can be tailored to suit your personal style and preferences, and can be paired with a variety of outfits and accessories to create a cohesive look.
1. Geometric Patterns with Negative Space
Here’s the truth: geometric patterns can add a touch of sophistication to any look. By incorporating negative space, you can create a clean and minimalist design that’s perfect for a night out or special occasion. Try pairing this look with a bold outfit, such as a bright yellow dress from Zara, and statement accessories, like a chunky necklace from H&M. Pro Tip: use a nail guide to create sharp, clean lines and achieve a precise geometric pattern. To take this look to the next level, experiment with different shapes and sizes to find the perfect combination that suits your style.
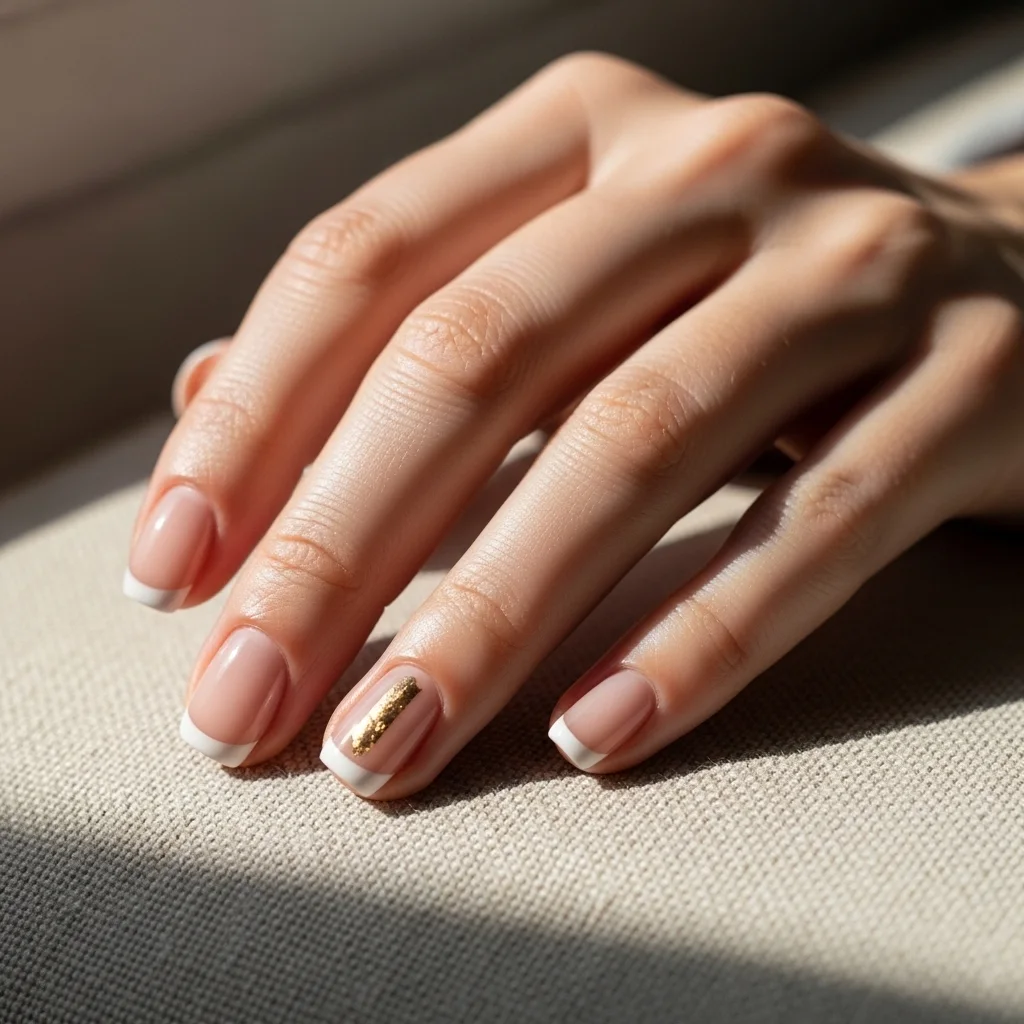
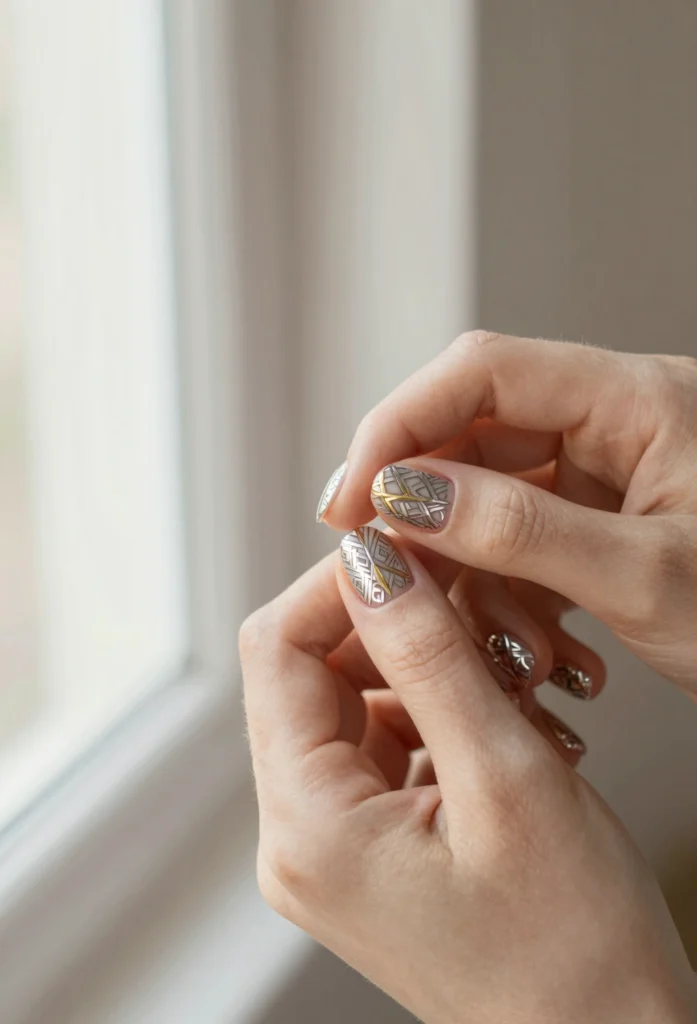
2. Metallic Accents with Neutral Base
You might be wondering: how can I add a touch of luxury to my everyday look? The answer lies in metallic accents, which can elevate a simple neutral base color to new heights. Pair this look with a pair of distressed denim jeans from Levi’s and a classic white shirt from Gap for a casual, yet stylish look. What most people miss is that metallic accents can be subtle, yet effective – try using a small accent nail or a delicate metallic stripe to add a touch of glamour to your overall look. To incorporate this look into your daily style, start by experimenting with different metallic colors and finding the one that complements your skin tone the best.
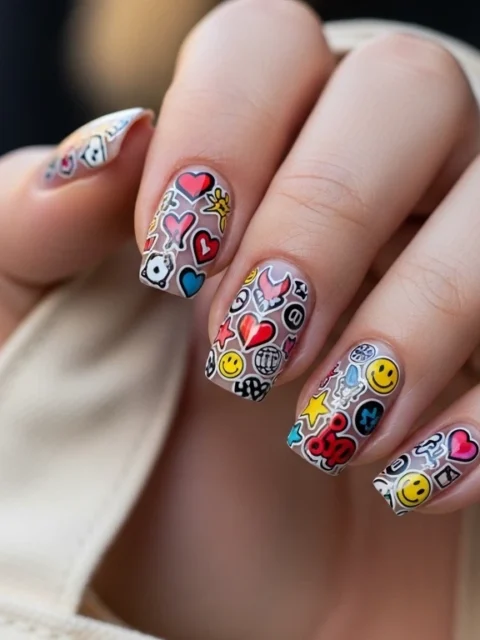
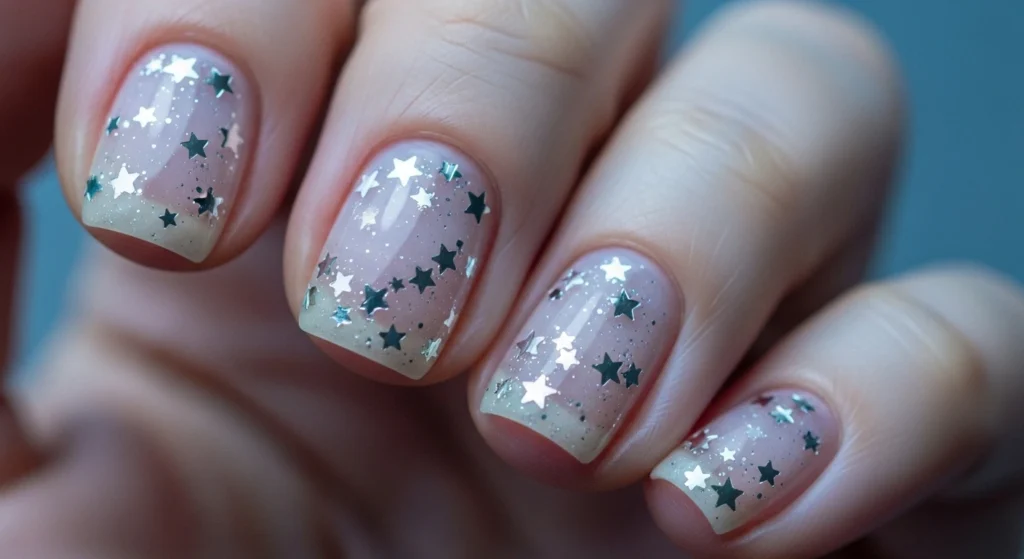
3. Abstract Designs with Pastel Colors
What most people miss is that abstract designs can be incredibly versatile, and can add a touch of whimsy to any look. By using pastel colors, such as pale pink or baby blue, you can create a soft and romantic design that’s perfect for spring and summer. Try pairing this look with a flowy sundress from Free People and sandals from Birkenstock for a bohemian-inspired look. Pro Tip: use a dotting tool to create intricate, abstract patterns that add texture and depth to your design. To take this look to the next level, experiment with different pastel colors and find the perfect combination that suits your style and personality.
4. Bold Stripes with Bright Colors
Here’s the truth: bold stripes can be intimidating, but they can also add a touch of confidence to any look. By using bright colors, such as red or orange, you can create a statement-making design that’s perfect for those who want to add a pop of color to their outfit. Try pairing this look with a pair of high-waisted black pants from ASOS and a graphic t-shirt from Uniqlo for a chic and modern look. What most people miss is that bold stripes can be balanced with neutral colors – try pairing bright stripes with a neutral base color to create a look that’s both bold and balanced. To incorporate this look into your daily style, start by experimenting with different stripe patterns and finding the one that suits your personality the best.
5. Delicate Florals with Soft Colors
You might be wondering: how can I add a touch of femininity to my look? The answer lies in delicate florals, which can add a romantic and whimsical touch to any design. By using soft colors, such as peach or lavender, you can create a sweet and delicate look that’s perfect for spring. Try pairing this look with a flowy maxi dress from Madewell and a pair of ankle boots from Dr. Martens for a bohemian-inspired look. Pro Tip: use a nail stamp to create intricate, delicate floral patterns that add texture and depth to your design. To take this look to the next level, experiment with different floral patterns and find the perfect combination that suits your style and personality.
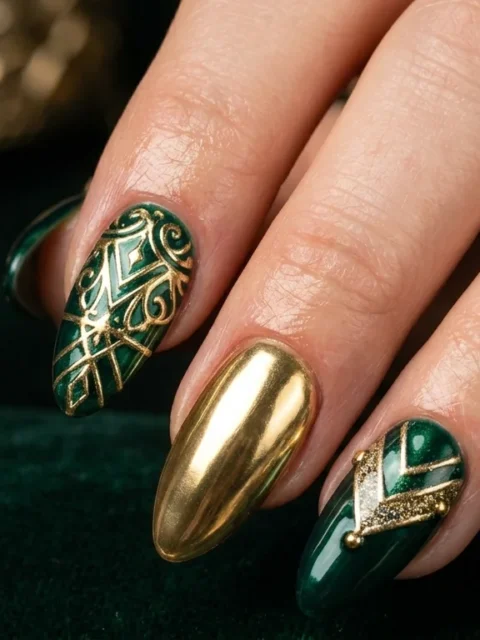
6. Chrome Finish with Metallic Colors
What most people miss is that a chrome finish can add a touch of luxury to any look, and can elevate a simple design to new heights. By using metallic colors, such as rose gold or copper, you can create a sophisticated and glamorous look that’s perfect for special occasions. Try pairing this look with a little black dress from Chanel and a pair of statement earrings from Tiffany & Co. for a glamorous and sophisticated look. Here’s the truth: a chrome finish can be intimidating, but it’s easier to achieve than you think – try using a chrome nail polish or a nail sticker to create a chrome finish that’s both easy and effective. To incorporate this look into your special occasion style, start by experimenting with different metallic colors and finding the one that complements your outfit the best.
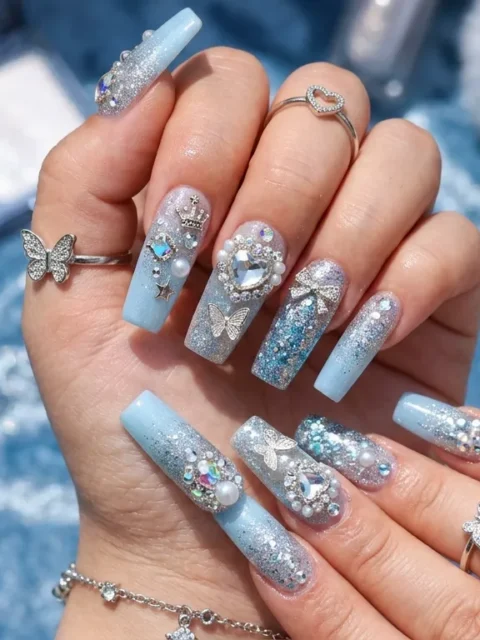
7. Ombre Effect with Gradient Colors
You might be wondering: how can I add a touch of personality to my look? The answer lies in an ombre effect, which can add a unique and eye-catching touch to any design. By using gradient colors, such as blue and purple, you can create a look that’s both trendy and modern. Try pairing this look with a pair of high-waisted jeans from AGOLDE and a cropped graphic t-shirt from Supreme for a trendy and modern look. Pro Tip: use a sponge or a makeup brush to create a soft, gradient effect that adds depth and dimension to your design. To take this look to the next level, experiment with different gradient colors and find the perfect combination that suits your style and personality. With a little practice and patience, you can create a look that’s truly show-stopping and uniquely yours.
How to Choose the Right One for You
When it comes to selecting a fuse style nail art idea, there are several factors to consider. Personal style plays a significant role in determining the right nail art for you. If you’re a fan of minimalist chic, look for simple, elegant designs that exude sophistication. On the other hand, if you’re a bold fashionista, you may prefer more dramatic and eye-catching designs.
Here’s the truth: your skin tone also plays a crucial role in choosing the right nail art. If you have cool skin, look for colors with blue or pink undertones, such as pastel pink or baby blue. These colors will help to create a harmonious balance with your skin tone. For example, you can pair pastel pink nails with a white flowy dress and neutral accessories for a romantic outfit.
If you have warm skin, look for colors with yellow or golden undertones, such as coral or honey. These colors will help to enhance your natural glow and create a sun-kissed look. You can pair coral nails with a flowy maxi dress and statement sunglasses for a bohemian-inspired outfit. What most people miss is that nail art can be a great way to complement your outfit and add a pop of color to your overall look.
You might be wondering: how do I choose a nail art style that complements my body type? The answer is to focus on balanced proportions. If you have short fingers, look for nail art designs that create a lengthening effect, such as vertical stripes or nail tips. If you have curvy fingers, look for designs that create a slimming effect, such as horizontal stripes or delicate patterns.
Pro Tip: consider your lifestyle when choosing a nail art style. If you have a busy schedule, look for designs that are easy to maintain, such as simple solid colors or subtle patterns. If you have a special occasion coming up, you may want to opt for a more dramatic and eye-catching design.
When it comes to budget, there are many affordable options available. You can opt for nail polish from Essie or Sally Hansen, which offer a wide range of colors and finishes at an affordable price point. Alternatively, you can invest in high-end options, such as nail art from Tom Ford or Christian Louboutin, which offer luxurious finishes and long-lasting wear.
Here’s the truth: budget vs investment is a personal choice. If you’re looking for a quick and easy nail art solution, affordable options may be the way to go. However, if you’re looking for a long-lasting and high-quality finish, investing in high-end options may be worth considering. You can also consider outfit formulas that incorporate your nail art style, such as pairing bold nails with a little black dress and statement earrings for a glamorous look.
What most people miss is that nail art can be a great way to express your personality and add a unique touch to your overall style. By considering your personal style, skin tone, and lifestyle, you can choose a fuse style nail art idea that makes you feel confident and beautiful. With so many options available, you’re sure to find a nail art style that suits your taste and budget.
Common Mistakes to Avoid
When it comes to creating stunning fuse style nail art, there are several common mistakes to avoid. Here’s the truth: these mistakes can make or break the overall look of your nail art.
What most people miss is that using low-quality nail polish can lead to a lackluster finish and a shorter-lasting design. This is because low-quality polish often lacks the necessary pigmentation and ingredients to create a rich, vibrant color.
You might be wondering why not prepping the nail properly is a mistake. The answer lies in the fact that a poorly prepped nail can lead to uneven polish application, causing the design to look messy and unprofessional.
To avoid this, make sure to cleanse and moisturize your nails before applying polish. This will help create a smooth canvas for your design.
One common mistake is using too many colors, which can make the design look busy and overwhelming. This is especially true for those with shorter nails, as too many colors can make the nail look even shorter.
To fix this, try sticking to a maximum of three colors and using a neutral background to let the other colors pop. For example, you can pair a bold red with a neutral beige and a metallic gold for a chic, sophisticated look.
Here’s another mistake: not considering the shape of the nail. This can lead to a design that looks unflattering or awkward on the nail.
For instance, if you have short and square nails, you may want to avoid designs that require a lot of length, such as intricate stripes or long, curved lines. Instead, opt for bold and geometric patterns that can add visual interest to your nails.
What’s more, not sealing the design with a top coat is a mistake that can cause the polish to chip and fade quickly. This is especially true for those who use their hands frequently, such as healthcare professionals or food service workers.
To avoid this, make sure to apply a high-quality top coat, such as Sally Hansen or Essie, to seal in the design and add an extra layer of protection.
Pro Tip: When choosing a top coat, look for one that is formaldehyde-free and nourishing, such as OPI’s Nail Envy, to help keep your nails healthy and strong.
You might be wondering how to balance budget vs investment picks when it comes to nail polish. The truth is, you don’t have to break the bank to get high-quality polish.
Consider investing in a few key colors, such as a classic red or a neutral beige, and then supplementing with more affordable options for accent colors. For example, you can pair a luxury red polish from Tom Ford with a more affordable gold glitter polish from Wet n Wild.
When it comes to creating a body-inclusive nail art look, consider your personal style and skin tone. For example, if you have cool undertones, you may look best in blue-based polishes, while those with warm undertones may look best in yellow-based polishes.
You can also use outfit formulas to create a cohesive look. For instance, if you’re wearing a little black dress, you can pair it with a bold red lip and a neutral nail color for a chic, sophisticated look.
By avoiding these common mistakes and considering your personal style and skin tone, you can create a stunning fuse style nail art look that makes you feel confident and beautiful.
Frequently Asked Questions
Q = What is fuse style nail art?
Fuse style nail art, also known as “fusion” or ” hybrid” nail art, combines two or more distinct nail art techniques to create a unique and eye-catching design. This style of nail art has gained immense popularity in recent years due to its versatility and ability to cater to various personal styles and preferences. Here’s the truth: fuse style nail art is all about pushing the boundaries of traditional nail art and experimenting with different techniques to create something truly bespoke.
Q = How do I create a fuse style nail art design?
Creating a fuse style nail art design requires a mix of creativity, patience, and practice. To get started, you’ll need to choose two or more nail art techniques that you want to combine, such as stamping, glazing, or stamping and glazing. What most people miss is that fuse style nail art is all about experimenting with different techniques and finding the right balance between them. Start by preparing your nails with a base coat, then apply the first technique, followed by the second technique, and finally seal it all with a top coat.
Q = What are some popular fuse style nail art ideas?
Some popular fuse style nail art ideas include combining a bold, bright color with a delicate, intricate design, or pairing a geometric pattern with a bold, eye-catching texture. You might be wondering what kind of designs would look great with fuse style nail art. The answer is: almost anything! From classic stripes to abstract art, fuse style nail art can elevate any design to the next level.
Q = How long does fuse style nail art last?
The longevity of fuse style nail art depends on several factors, including the quality of the products used, the skill level of the nail artist, and how well you take care of your nails. On average, a well-done fuse style nail art design can last anywhere from 5 to 14 days, but with proper care and maintenance, it can last even longer. Pro Tip: To extend the life of your fuse style nail art, make sure to apply a strengthening base coat and use a nail polish top coat that contains UV blockers.
Q = Can I do fuse style nail art at home?
While it’s definitely possible to create fuse style nail art at home, it may require some practice and patience. To get started, you’ll need to invest in a few basic nail art tools, such as a nail art brush, nail art stampers, and a nail polish set. What most people miss is that fuse style nail art is all about being creative and experimenting with different techniques, so don’t be afraid to try new things and make mistakes – they’re all part of the learning process!
Q = What are some tips for creating a successful fuse style nail art design?
To create a successful fuse style nail art design, remember to start with a clean slate, use high-quality products, and take your time. Pro Tip: Before applying the second technique, make sure the first technique is completely dry to avoid smudging or smearing. Additionally, consider using a nail art guide or stencils to help you achieve crisp, clean lines. And most importantly, have fun and be creative – fuse style nail art is all about experimenting and pushing the boundaries of traditional nail art!
Key Takeaways
As we’ve explored the world of 7 Fuse Style Nail Art Ideas, you’re now equipped with the knowledge and inspiration to elevate your short nails game. Here are the key takeaways to keep in mind:
- Versatility is key: Fuse style nail art is not limited to a specific design or style. Experiment with different techniques, colors, and patterns to create a look that’s uniquely yours.
- Choose a design that suits your style: What most people miss is that fuse style nail art is a form of self-expression. Consider your personal style, skin tone, and the occasion when selecting a design. For example, if you’re going for a formal look, a more subtle design might be the way to go.
- Invest in quality: You might be wondering if it’s worth investing in high-quality nail polish. The answer is yes! A good polish will provide a smooth, even finish that lasts longer and looks better.
- Proper prep is essential: Before applying nail art, make sure to prep the nail properly. This includes shaping, buffing, and cleansing the nail surface. Pro Tip: Use a nail cleanser to remove oils and residue that can interfere with polish adhesion.
- Seal the deal with a top coat: What most people miss is that a good top coat can make all the difference in the longevity of your nail art. Choose a top coat that’s specifically designed for nail art and apply it evenly to seal in your design.
- Budget-friendly options exist: You don’t have to break the bank to achieve a salon-quality nail art look. Look for affordable options at stores like Sally Hansen or Revlon for a budget-friendly alternative.
As you embark on your fuse style nail art journey, remember to have fun and be creative! Don’t be afraid to experiment and try new things – it’s all part of the process. And when you’re ready to show off your new look, save this pin for future reference and inspiration!